
TRANSPLANTING
How to Harden Off and Transplant Pepper Seedlings
Move pepper seedlings outdoors with a flexible hardening timeline, readiness checks, sun and wind progression, warm-weather transplant timing, correct depth and spacing, and first-week stress care.
PeppersTransplantingBeginner → advanced
Published by Hollowstead Seed Co. · How this guide is prepared
Quick answer
Harden pepper seedlings gradually over roughly 7–14 days: begin with a short stay in a sheltered outdoor spot, then add sun, wind, and time outside in stages. Minnesota Extension recommends protecting seedlings from wind at first and bringing them back in when nights fall below about 55°F during hardening.[1]
The roughly 55°F threshold protects tender, movable seedlings during acclimation; a transplanting decision considers the whole forecast, warmed soil, and frost risk, with nights reliably above about 50°F as a lower planning reference. Transplant after frost danger has passed and nights are reliably warm. Peppers recover poorly from a “head start” into cold, wet soil, so plant condition and the forecast matter more than the date on a calendar.
Hardening and transplanting at a glance
| Question | Useful starting point |
|---|---|
| Hardening length | About 1–2 weeks |
| First exposure | Sheltered, short, mild-weather session |
| Night protection | Bring in when nights turn cold; ~55°F is a useful hardening reference |
| Transplant timing | After frost danger; nights above about 50°F |
| Depth | Approximately the same level as in the pot |
| Spacing | Often 12–24 inches depending on cultivar/system |
| First-week priority | Root establishment + steady moisture |
What hardening off actually does
An indoor pepper leaf has developed under gentle light, low wind, and a relatively narrow temperature range. Outdoors, that leaf suddenly faces stronger radiation, moving air, faster water loss, and larger temperature swings. Hardening off gives the plant time to adjust its tissues and water balance before roots are also disturbed by transplanting.
The goal is not to make a pepper suffer. A wilted plant left in full sun until evening is not “extra hardened”; it is stressed.
Before you start: is the seedling ready?
A good transplant is compact, actively growing, rooted through its container without being severely pot-bound, and free from obvious pest or disease problems. Minnesota recommends sturdy pepper plants and warns against buying transplants with spotted leaves.[1]
Very small seedlings can be hardened, but they are easier to dry out. Oversized flowering plants are harder to establish because a restricted root ball is already trying to support reproductive growth. Missouri Extension recommends removing flowers and small fruit from transplants so energy can go into roots and leaves after planting.[2]
A practical hardening-off process
- Start shelteredPut seedlings outside briefly in bright shade or gentle morning sun, protected from wind.
- Add direct sunIncrease morning sun while continuing to avoid harsh midday exposure.
- Add timeExtend the outdoor session as leaves stay firm and containers hold moisture.
- Add wind graduallyLet plants experience ordinary air movement after they tolerate sun.
- Approach a full dayAllow longer sun and normal conditions while still protecting from extremes.
- Trial eveningIf nights are mild, let plants stay out later; do not force a cold overnight test.
- TransplantChoose a calm, mild period and water the root ball into its new soil.
Flexible pepper hardening progression
- Plan roughly 7–14 days of increasing outdoor exposure. Pause for cold, wind or scorching sun; day seven is not an automatic transplant deadline.
This is a progression, not a seven-day timer. Cloudy weather may let you advance duration but not sun tolerance. A sudden hot, windy day may justify repeating an easier stage.
Sun and wind are separate stresses
Gardeners often focus on sunlight and forget wind. Moving air accelerates evaporation from leaves and small pots and physically bends soft indoor-grown stems. Minnesota specifically recommends wind protection when peppers first go outside.[1]
Begin with morning sun because it is easier to manage than intense late-afternoon exposure. Watch the plant, not just the clock. Leaves that remain firm and normally colored after returning indoors are a better signal than “day three.”
When peppers are ready to transplant
Wait until frost danger has passed and nighttime lows are above about 50°F; Minnesota uses that as its outside-planting reference.[1] Missouri Extension notes that peppers generally need warmer conditions than tomatoes and are often transplanted later.[2]
Soil condition matters too. Peppers grow poorly during cool, wet weather. A raised bed or black plastic mulch can help warm early-season soil in appropriate climates, but no mulch can turn a prolonged cold forecast into good transplant weather.[2]
Depth and spacing
Plant peppers at approximately the same depth they occupied in the pot. Do not default to burying long pepper stems the way gardeners commonly do with tomatoes. Space according to cultivar and support system; common Extension guidance spans roughly 12–24 inches, with about 18 inches a reasonable starting point for many home gardens.[1][2]
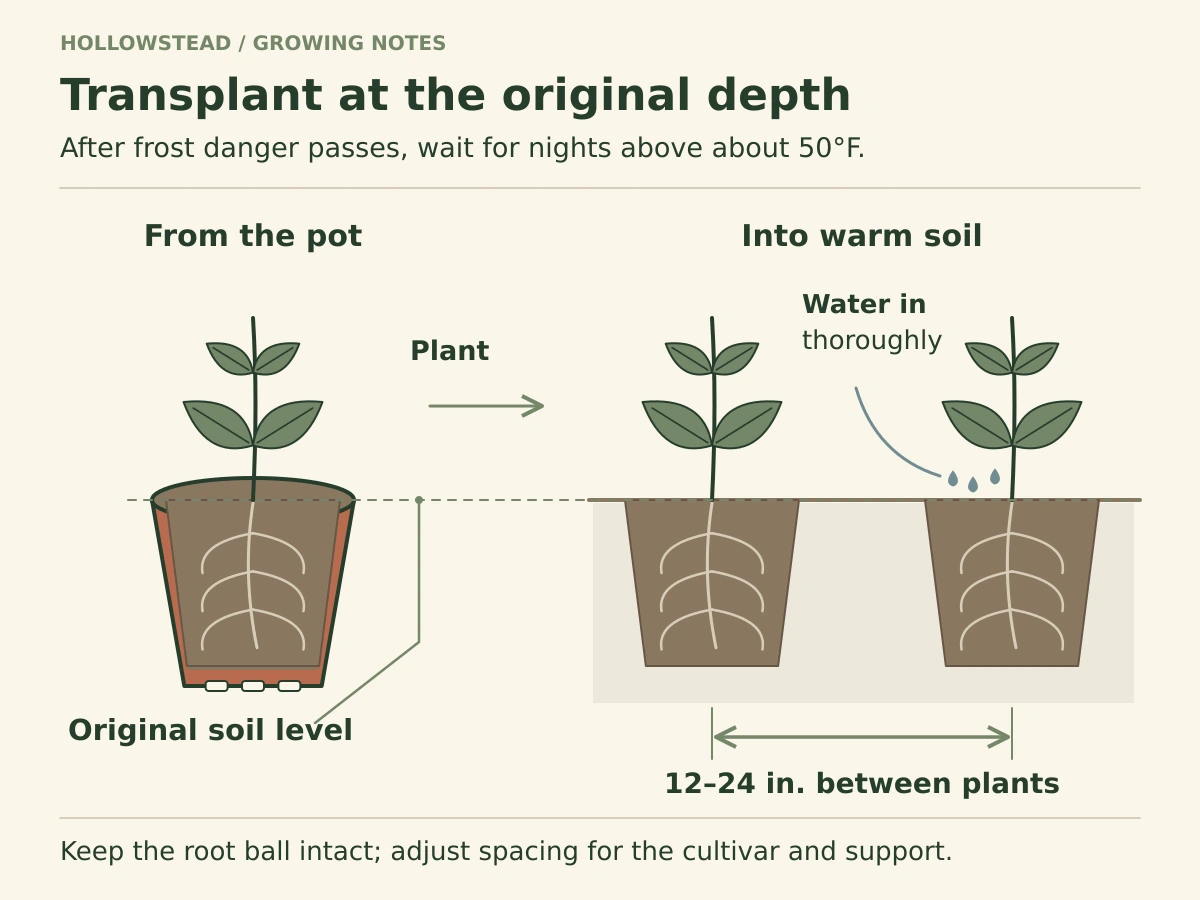 View full-size diagram
Water the root ball before transplanting if it is dry, and water again after planting to settle soil around roots. Avoid crushing the root ball or stripping roots apart aggressively unless they are severely circling.
Care during the first week
The first week is about root establishment, not maximizing visible top growth. Keep the root zone evenly moist but not saturated. Protect a newly planted pepper from an exceptional cold snap, violent wind, or abrupt heat event.
Do not respond to every droopy afternoon leaf with fertilizer. If the soil is already wet, adding more water can make root oxygen worse. Check moisture below the surface before watering.
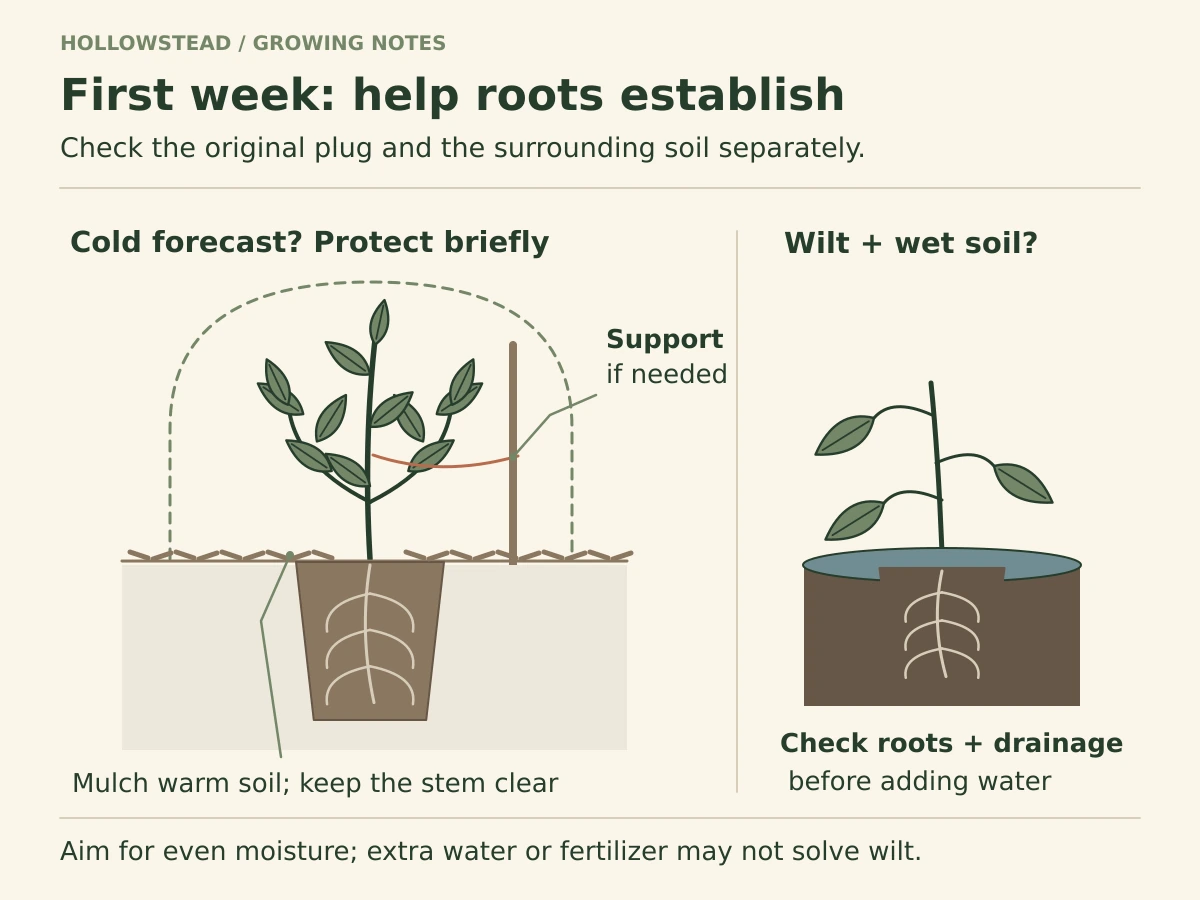 View full-size diagram
Hardening-off stress response chart
What transplant stress looks like
A recently transplanted pepper may droop temporarily, pause growth, or shed an early flower. That is different from a stem collapsing at the soil line, progressive wilting in wet soil, or spreading leaf lesions. Healthy transplant stress should stabilize as roots reconnect with the surrounding soil.
What if the weather turns bad halfway through?
Pause. Bring portable seedlings back under protection or move them into a sheltered location. Hardening progress is not erased because you protected plants from a frost warning, thunderstorm, or 40-mph wind.
If already transplanted, use temporary row cover or another appropriate physical protection for a brief cold event, but remove or vent protection as temperatures rise so plants do not overheat.
GROW THESE PEPPERS
Put the guide to work.
Both Hollowstead peppers benefit from patience at transplant time; warm establishment is more valuable than being first into cold soil.
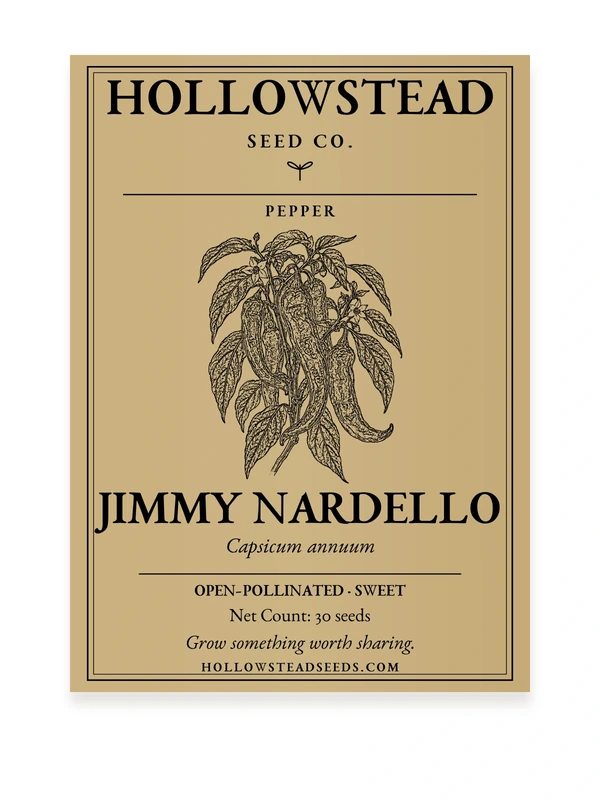
HOLLOWSTEAD SEED
Jimmy Nardello Sweet Pepper Seeds
$4.49
HOLLOWSTEAD SEED
Fish Pepper Seeds
$3.99KEEP LEARNING
Related Hollowstead guides
PEPPER SEED STARTING
Growing Peppers From Seed: The Complete Guide
Grow peppers from seed through harvest with warm germination, strong seedlings, soil preparation, transplant timing, steady moisture, sensible fertility, fruit-set troubleshooting, disease prevention, and harvest care.
Read the guide
TROUBLESHOOTING
Why Pepper Seeds Take So Long to Germinate
Troubleshoot slow pepper germination by checking root-zone temperature, moisture and oxygen, sowing depth, seed age, heat-mat use, damping-off symptoms, and when to start a backup sowing.
Read the guide
TROUBLESHOOTING
Why Pepper Flowers Fall Off or Don’t Set Fruit
Diagnose pepper blossom drop with temperature thresholds, moisture and fertility checks, pollination context, early-flower guidance, container heat clues, and a fast fruit-set decision chart.
Read the guideFrequently asked questions
How long should I harden peppers off?
Roughly one to two weeks is a useful range, adjusted for your weather and the plant’s response.
Can pepper seedlings stay outside overnight?
Only when they have been acclimated and nights are mild. During hardening, Minnesota recommends bringing them in below about 55°F.
Should I transplant peppers before tomatoes?
Usually no. Peppers prefer warmer establishment conditions; Missouri notes they are commonly transplanted later than tomatoes.
Should I remove flowers before transplanting?
If a small indoor transplant is already flowering or carrying tiny fruit, removing them can redirect resources toward root and leaf establishment.
Sources & further reading
- University of Minnesota Extension Growing peppers in home gardens https://extension.umn.edu/garden-and-home/yard-and-garden/gardening-in-minnesota/growing-peppers
- University of Missouri Extension Growing Sweet Peppers in Missouri https://extension.missouri.edu/publications/g6372
- Seed Savers Exchange Growing Guide: Peppers https://seedsavers.org/grow-pepper/
Hollowstead Growing Notes
A little help for your next growing season
Practical sowing advice, help choosing seeds, and occasional Hollowstead shop news. Usually one or two emails a month, plus a short welcome note.
Choose your topics and frequency after you confirm. Our guides and planting calendar are always free.