
SEED STARTING
The Complete Guide to Growing Tomatoes From Seed
Start tomato seeds with confidence. This guide covers the quick version first, then goes deep on temperature, light, watering, potting up, hardening off, transplant timing, containers, and common seedling problems.
TomatoesSeed startingBeginner → advanced
Published by Hollowstead Seed Co. · How this guide is prepared

Quick answer
For most home gardeners, start tomato seeds indoors about 5–7 weeks before you expect to transplant them outside. Sow them about 1/4 inch deep in a clean seed-starting mix, keep the medium evenly moist, and aim for roughly 75–85°F around the seed tray while they germinate. Under good conditions, many tomato seeds emerge in about 7–10 days, although some take closer to two weeks.[1][2][3]
The moment seedlings emerge, the priority changes. They no longer need maximum germination warmth; they need strong light immediately. Under artificial lights, about 14–16 hours of light per day is a useful home-growing target. Keep seedlings evenly moist but not soggy, give them airflow, and pot them up when true leaves have developed and their cells are becoming crowded.[1][4][5]
Before planting outside, harden them off gradually over roughly 7–14 days. Transplant only after frost danger has passed and outdoor conditions are reliably warm enough for a warm-season crop. A healthy tomato transplant is usually more valuable than the oldest or tallest transplant—you are aiming for a compact, actively growing plant that can establish quickly.[1][6]
The short version: Warm for germination. Bright light after emergence. Do not drown the roots. Do not start so early that you create a giant indoor plant. Harden off gradually. Plant outside when the weather, soil, and seedling are all ready.
Tomato seed-starting at a glance
| Question | Useful Hollowstead starting point |
|---|---|
| When to start indoors | About 5–7 weeks before your likely transplant window; 6–8 weeks is also common guidance |
| Sowing depth | About 1/4 inch |
| Germination target | Roughly 75–85°F around the seed-starting medium |
| Typical emergence | Often 7–10 days; allow roughly 7–14 days |
| Light after emergence | Strong light immediately; about 14–16 hours/day under artificial lights |
| Post-emergence temperature | Cooler than the germination phase; roughly mid-60s to mid-70s °F days works well |
| First fertilizer | If the mix has little/no fertility, begin dilute feeding after true leaves develop |
| Hardening off | Roughly 7–14 days, adjusted to weather |
| Transplant outside | After frost danger has passed and soil/weather have warmed |
| Supported spacing | Often 18–24 inches for tightly managed supported plants; more room for large cages/vigorous vines |
| Standard tomato container | 5 gallons is a practical minimum reference; vigorous indeterminates are more forgiving in larger containers |
The table is intentionally a starting point, not a set of laws. Seed age, cultivar, light intensity, pot size, weather, and the way you support the plants can all change what works best.
Before committing a planting window to an older packet, use the seed-storage and home germination-test guide. It helps separate an uncertain seed lot from problems in the seedbed.
- SowStart indoors from a realistic transplant window rather than from the calendar alone.
- GerminateKeep the seed-starting medium warm and evenly moist until seedlings emerge.
- Build the transplantShift immediately to strong light, airflow, careful watering, and enough root space.
- Harden offAcclimate seedlings gradually to outdoor sun, wind, and temperature swings.
- TransplantPlant into prepared soil when frost risk, soil warmth, weather, and plant condition align.
- Flower and set fruitSupport steady growth with consistent moisture, sensible fertility, and a healthy canopy.
- Harvest and resetPick for quality, record what worked, then clean up and rotate where practical.
When should you start tomato seeds indoors?
Work backward from when the plants can realistically go outside, not from a date printed in a generic gardening calendar.
University Extension recommendations commonly fall around five to eight weeks indoors for tomatoes.[1][3][4] That range works because tomatoes grow quickly once they have warmth, light, and root space. Starting ten or twelve weeks early can sound like a way to get a head start, but it often creates a different problem: a large transplant that must be watered more frequently, kept under stronger light, repeatedly potted up, and protected indoors while it waits for the weather.
Start from your transplant window
Ask these questions:
- When is damaging frost usually finished in my area?
- Are nighttime temperatures staying reasonably mild for a warm-season transplant?
- Has the soil warmed enough that growth will not stall immediately after planting?
- Do I have a way to protect plants if an unusual cold night arrives?
Then count backward roughly five to seven weeks.
A gardener in a short northern season may want sturdy transplants ready as soon as conditions become safe. A gardener in a long southern season may have more flexibility and may even use multiple tomato plantings. The plant biology is the same; the calendar is not.
Starting earlier does not automatically mean harvesting earlier
A tomato that spends too long indoors can become root-bound, stretched, flowering prematurely, or simply difficult to keep healthy. Extension guidance from Minnesota specifically notes that plants started excessively early are harder to manage and do not necessarily provide an earlier harvest.[1]
Choosing seed-starting containers and mix
Tomato seeds do not need a complicated container. Cell trays, small pots, soil blocks, recycled nursery containers, and community flats can all work if they provide:
- drainage;
- enough depth for the first root system;
- a clean medium that holds moisture while still containing air;
- enough access to light once seedlings emerge.
A purpose-made seed-starting mix is useful because it is lightweight and relatively uniform. Garden soil is usually a poor indoor seed-starting medium: it can compact in small cells, drain unpredictably, and bring soil organisms indoors. Clean containers and fresh, well-drained media also reduce damping-off risk.[5]
Does the seed-starting mix need fertilizer?
Not necessarily for germination. A seed contains stored energy to begin germination and produce its first seed leaves. Nutritional needs become more important as true leaves develop.
Some commercial mixes already contain a starter charge or slow-release fertilizer; others are nearly nutrient-free. Read the bag. If the mix is nutrient-free, diluted fertilizer can begin after true leaves develop rather than immediately after sowing.[4][5]
For a pot-grown plant, work through container size, support, watering, and feeding for tomatoes as one plan.
How deep should tomato seeds be planted?
Sow about ¼ inch deep in seed-starting mix; Minnesota Extension uses that depth for tomatoes.[1]
The easiest way to get consistent depth is:
- Fill and moisten the cells before sowing.
- Make a shallow depression about 1/4 inch deep.
- Place the seed.
- Cover lightly with mix.
- Gently settle the surface so the seed has contact with moist media.
There is no benefit to packing the surface hard. Roots need both water and oxygen.
What happens if tomato seeds are planted too deep?
A deeply buried seed has farther to travel before its limited stored energy can put a shoot into the light. Deep, wet media can also remain poorly aerated. Shallow, consistent sowing makes emergence easier to monitor and usually produces a more uniform tray.
Moisture before germination
The goal is even moisture, not saturation.
After sowing, water gently enough that you do not wash seeds to the corners of the cell. A humidity dome or clear cover can slow evaporation during germination, but remove it once seedlings begin emerging so humidity and airflow can normalize.[4]
Check trays more often when using a heat mat. Warm media loses water faster.[1]
Bottom watering vs. watering from above
Either can work.
Bottom watering is useful once roots are established because it reduces splashing and encourages the medium to wick moisture upward. Top watering is perfectly workable when done gently. The important part is that the root zone gets moisture without staying chronically waterlogged.
A useful practical test is to learn the weight of the tray when evenly moist. With experience, lifting a cell pack often tells you more than staring at the color of the surface.
The best temperature for germinating tomato seeds
Tomatoes are warm-season plants, and germination responds strongly to temperature.
For home seed starting, Hollowstead uses 75–85°F as a practical target around the germination medium. University of Minnesota recommends 75–85°F for best tomato germination, while Penn State’s broader seed-biology table shows tomatoes germinating across a wider range with an optimum near the warmer end.[1][2]
That does not mean a seed fails at 70°F. It means warmth usually makes emergence faster and more uniform.
Air temperature is not the same as media temperature
A room can be 70°F while a seed tray on a cold windowsill is much cooler. Conversely, a heat mat can warm the root zone above room temperature.
If germination is slow, measure where the seeds actually are. A cheap probe thermometer can answer a question that guessing at room temperature cannot.
Heat mats: useful, not mandatory
A seedling heat mat is especially useful in a cool house, basement, or early-spring seed room. It is less useful if the tray is already sitting in the target range.
Heat mats also increase evaporation. A tray that stayed moist for two days without heat may need attention much sooner once bottom heat is added.[1]
Remove the “germination mindset” after emergence
One of the easiest mistakes in seed starting is leaving newly emerged tomatoes in a warm, dim germination setup.
Once green seedlings appear, the job changes from getting seeds to sprout to growing compact plants. Strong light becomes urgent, and slightly cooler growing conditions are often easier to manage than constant high germination warmth.[2]
Tomato seed-starting steps: sowing depth, warm mix, and cover removal at emergence
- Sow about ¼ inch deep in moist mix at 75–85°F; emergence often takes 7–14 days. Remove the humidity cover when seedlings emerge.
How long do tomato seeds take to germinate?
Under good warmth and moisture, 7–10 days is a useful expectation.[3] Missouri Extension guidance allows roughly 7–14 days.[7]
Do not panic because one seed emerged on day five and another cell is empty on day nine. Individual seeds differ, especially in older lots.
Before declaring a tray a failure, check:
- Was the medium actually warm?
- Did it dry out at any point?
- Was it saturated for long periods?
- How old was the seed?
- Was the seed planted much deeper than intended?
A tray at 60°F may simply be operating on a very different schedule from one at 80°F.
What to do the moment tomato seedlings emerge
Once the first seedlings break the surface:
- Turn on or move them under strong light immediately.
- Remove a humidity dome if one is still on the tray.
- Make sure air can move around the seedlings.
- Keep the mix evenly moist, not constantly saturated.
- If only a few seeds have emerged, do not leave those seedlings in darkness waiting for every cell to catch up.
The first several days matter. A seedling can stretch quickly when it has warmth without enough usable light.
How much light do tomato seedlings need?
Tomato seedlings need substantially more usable light than a typical indoor room provides.
Under artificial lighting, 14–16 hours per day is a useful target supported by Extension seed-starting guidance.[4][5] They also need a dark period; there is no reason to run lights continuously for 24 hours.
Why we do not give one universal “hang the light X inches away” rule
A weak shop light and a high-output modern LED fixture are not equivalent. Distance matters only in relation to intensity and fixture design.
Instead, watch the plants:
- stretching, leaning, wide gaps between leaves: often too little usable light;
- bleached/scorched upper leaves or excessive heat at canopy level: potentially too intense/close;
- compact stems and closely spaced leaves: usually a better sign.
If your fixture manufacturer provides a seedling-height recommendation, start there and then watch plant response.
Why a bright window often disappoints
A south-facing window can help, but windows reduce light and the sun arrives from one direction for only part of the day. Seedlings often bend toward the glass. Extension sources repeatedly recommend supplemental overhead light for compact seedlings.[1][5]
Tomato seedling care after emergence
- Provide 14–16 hours of strong overhead light and a dark period; reduce germination heat and pot up before roots crowd.
Temperature after emergence
After seedlings are up, you can stop chasing maximum germination warmth.
Penn State lists tomato transplant-growing temperatures around 65–75°F during the day and 60–65°F at night.[2] University of Minnesota describes a root-zone temperature around 70°F as ideal after emergence.[1]
Warmth drives growth. If the plant is growing rapidly but light is marginal, the result is often a taller, weaker-looking seedling.
How to water tomato seedlings
Water the root zone, not the calendar.
A cell tray under bright lights in dry indoor air may need water frequently. A freshly potted seedling in a large damp container may not.
A simple watering method
- Check moisture below the very surface.
- Water thoroughly enough to moisten the root zone.
- Let excess water drain.
- Do not leave the tray indefinitely sitting in deep standing water.
- Water again when the mix is beginning to dry, before the plant reaches damaging wilt.
Repeated tiny sips can leave only part of the root zone moist. Constant saturation can reduce oxygen around roots and favor disease.
For a dark, sunken patch at the blossom end of a fruit, use the blossom-end-rot diagnosis and prevention guide before adding a supplement.
Airflow and damping-off prevention
“Damping off” is not another word for a seedling that looks weak. It is disease involving young roots, crowns, or stems. Common damping-off organisms include Pythium, Rhizoctonia, and Fusarium.[5]
Signs that suggest damping off
- seedlings fail to emerge after germinating;
- the stem becomes water-soaked or thread-thin near the soil line;
- seedlings suddenly topple;
- roots are brown, weak, or rotting;
- fuzzy fungal growth appears in humid conditions.
Conditions that increase risk
University of Minnesota identifies cool/wet conditions, overwatering, low light, high fertilizer salts, and slow growth as factors that can increase damping-off risk.[5]
Prevention is mostly environmental:
- use clean containers;
- use fresh, well-drained seed-starting mix;
- provide drainage;
- avoid constantly saturated media;
- provide good light;
- provide reasonable airflow;
- avoid overfertilizing very young seedlings.
A small fan can help move air through a seed-starting area, but do not blast tiny seedlings continuously like they are in a wind tunnel.
Cotyledons vs. true leaves
The first pair of leaves on a tomato seedling are cotyledons, or seed leaves. They do not look like mature tomato foliage.
The next leaves—the first leaves with a more recognizably tomato shape—are true leaves.
Why this matters:
- true leaves are a useful milestone for thinning or transplanting seedlings;
- fertilizer guidance often changes once true leaves are present;
- a seedling with only cotyledons is still in a very early stage of development.
Should you thin tomato seedlings?
If you sowed more than one seed per cell and several emerged, do not let them compete indefinitely.
You can:
- snip the weaker seedlings at soil level and keep the strongest; or
- carefully separate them after true leaves develop if you want to save every plant.
Snipping is lower-risk because it avoids disturbing the root system of the plant you keep. Separating works, but tomato roots tangle quickly in a crowded cell.
When to pot up tomato seedlings
Pot up when the plant is outgrowing its current root volume, not merely because a calendar says two weeks have passed.
Useful cues include:
- true leaves have developed;
- roots are filling the cell;
- the medium dries very quickly because the root mass has become large;
- neighboring seedlings are crowding and shading each other;
- the plant is becoming top-heavy relative to its container.
Move into a container large enough to give the roots room without putting a tiny plant into an enormous amount of slow-drying wet mix.
Can you bury tomato seedlings deeper when potting up?
Yes. Tomatoes are unusually forgiving about deeper planting because buried stem tissue can form adventitious roots.[1][8][9]
For a stretched tomato seedling, potting deeper can shorten the above-soil portion and add rooting area.
How to do it
- Remove leaves that would be buried.
- Place the root ball lower in the new pot.
- Backfill around part of the stem.
- Keep the remaining foliage above the soil.
Do not assume this technique applies to every vegetable. Tomatoes tolerate deep stem burial unusually well; peppers and many other crops are handled differently.
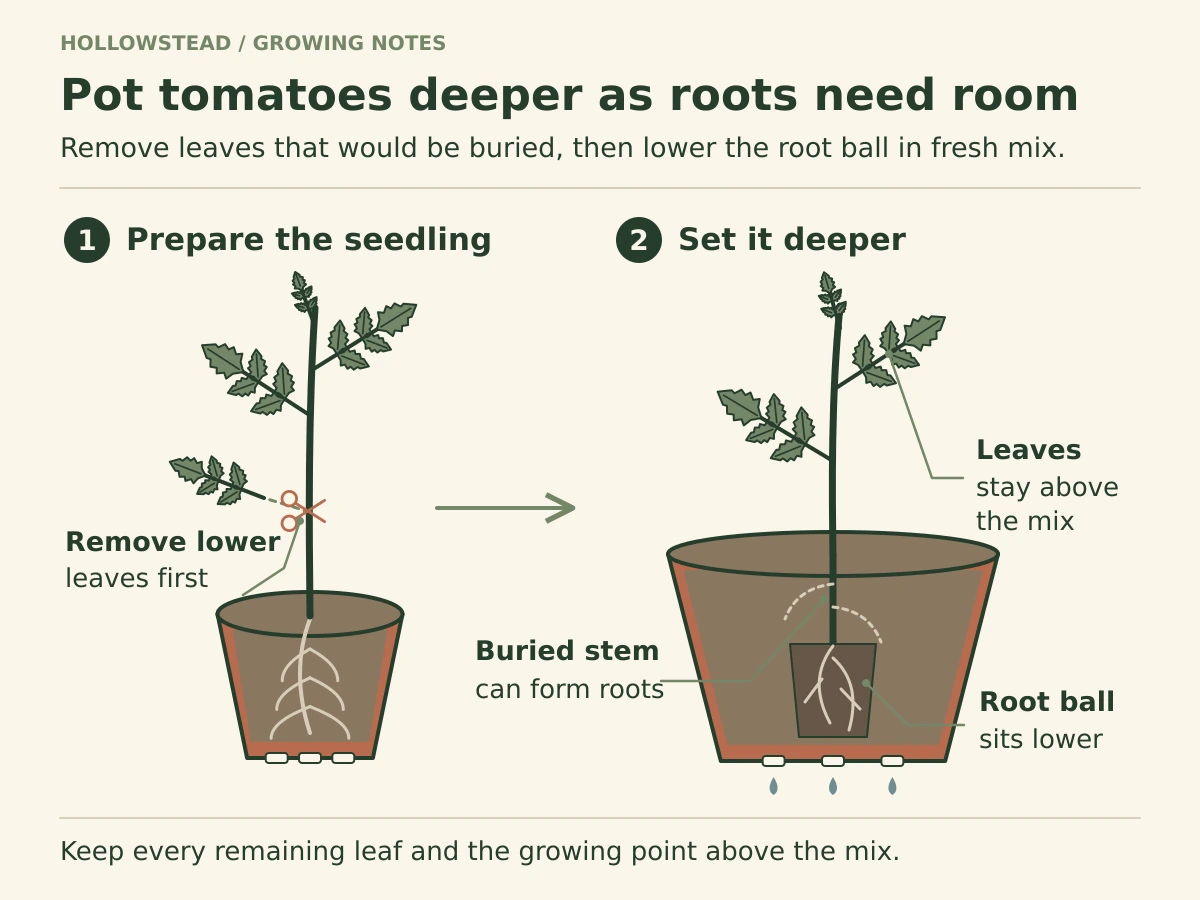 View full-size diagram
Fertilizing tomato seedlings
Seeds do not need a full fertilizer program to germinate. Young seedlings also do not benefit from being pushed with heavy fertilizer.
If your mix contains no meaningful nutrients, begin a dilute soluble fertilizer after true leaves have developed. University of Minnesota recommends waiting until several true leaves and then using a weak solution in nutrient-poor mixes; Illinois guidance likewise introduces weak fertilizer after true leaves.[4][5]
More fertilizer does not equal a better transplant
Excess fertilizer can:
- burn roots through high soluble-salt levels;
- drive soft, fast growth;
- worsen imbalance when light is insufficient.
The objective is steady, compact growth—not the biggest possible plant in the shortest possible time.
How to prevent leggy tomato seedlings
Leggy seedlings are unusually tall, thin, and stretched relative to their leaf development.
The most common practical cause is insufficient usable light relative to the rate of growth.[1][2]
That can happen because:
- the light is too weak;
- the fixture is too far away;
- seedlings are relying on a window;
- plants are crowded and shading one another;
- the growing area is very warm, driving rapid growth under marginal light.
What to do immediately
- Increase usable light.
- Adjust fixture position/intensity appropriately for your equipment.
- Separate crowded seedlings.
- Stop adding unnecessary heat after emergence.
- Pot stretched tomatoes deeper if they need more root room.
A dedicated Hollowstead guide covers the difference between a seedling that can recover and one that is better restarted.
Purple, yellow, curled, or stalled tomato seedlings
A symptom is a clue—not a diagnosis.
| Symptom | Possible causes to check first | What to examine |
|---|---|---|
| Pale/yellow lower leaves | nutrient shortage, saturated roots, insufficient light | mix fertility, drainage, root condition, light |
| Purple coloration | cool root zone, cultivar tendency, nutrient uptake stress | temperature, root health, overall growth |
| Curling leaves | heat/light stress, irregular watering, root restriction, physical stress | environment and recent changes |
| Stalled growth | cool roots, poor light, overwatering, root damage, nutrient issue | root color, temperature, light, drainage |
| Falling over at soil line | damping off | stem constriction, water-soaked tissue, root rot |
| Very long thin stems | insufficient light relative to growth | fixture/intensity, crowding, warmth |
Do not treat every discolored seedling with fertilizer. If roots are suffocating in saturated media, adding more fertilizer does not solve the primary problem.
How to harden off tomato seedlings
Indoor seedlings have lived in protected conditions. Outdoor sun, wind, temperature swings, and evaporation are much harsher.
Hardening off is the gradual acclimation process before transplanting.
A useful window is about 7–14 days, although University of Maryland gives a broader 5–14 day range because weather and crop condition vary.[6]
A flexible hardening-off progression
Early days:
- put plants outside in bright shade or limited gentle sun;
- protect them from strong wind;
- bring warm-season seedlings in before cold nights.
Middle:
- gradually increase direct sun;
- gradually allow more normal outdoor air movement;
- monitor watering because pots dry faster outside.
Later:
- leave plants outside for most of the day when weather is appropriate;
- expose them to the normal conditions they will face after transplanting;
- avoid a sudden jump from a protected room to an all-day hot, windy garden.
University of Maryland recommends bringing tomato and pepper transplants in when nights are expected below about 50°F during hardening.[6]
When are tomato seedlings actually ready to transplant?
Use three kinds of readiness together.
1. Weather readiness
- frost danger has passed or you have reliable protection;
- nights are no longer routinely cold for a warm-season crop;
- a cold snap is not about to arrive immediately after planting.
2. Soil readiness
The soil should have warmed enough that the plant can establish rather than sit cold and stalled. Around 60°F soil temperature is a useful warm-season reference, but do not treat it as a magical on/off switch. Soil texture, sun exposure, mulch, raised beds, and weather trend all matter.[6]
3. Plant readiness
A good transplant is:
- actively growing;
- reasonably compact;
- well-rooted but not a solid brick of circling roots;
- hardened off;
- free of obvious disease or severe stress.
A flowering transplant is not automatically “better.” The goal is rapid establishment.
Soil testing, pH, and bed preparation
A tomato bed is easier to correct before the roots occupy it. Start with drainage and a soil test rather than a bag of whatever fertilizer happens to be marketed for tomatoes. University of Missouri Extension makes soil testing the first step in garden fertilization because the report tells you pH and existing nutrient levels that cannot be judged reliably by sight or feel.[18]
Use pH 5.5–7.0 as a practical tomato soil target, as Minnesota Extension recommends. Follow your local soil-test recommendations for amendments; do not add lime, sulfur, calcium, magnesium or phosphorus just because a generic tomato checklist includes them.[1]
- Test first
- pH + existing nutrients
- Root zone
- Well drained, not chronically saturated
- Sun
- Full-sun exposure for productive plants
- Organic matter
- Useful for soil structure and water handling
- Fertilizer rule
- Feed the soil and crop need—not a slogan
How deep should you plant tomato transplants?
Tomatoes can be planted deeper than they grew in the pot because buried stems can root.[1][8][9]
For a stocky transplant, plant the root ball and a portion of the lower stem below soil level if needed. For a very tall transplant, trench planting is an option: lay part of the lower stem nearly horizontal in a shallow trench and turn the leafy top upward.
Remove leaves that would be buried.
Why trench planting can help
The upper few inches of spring soil can be warmer than deeper soil. A shallow trench can bury a long stem without placing the original root ball unusually deep into colder ground.[9]
How far apart should tomatoes be planted?
There is no single spacing because support and growth habit matter.
Extension references commonly place supported tomatoes around 18–24 inches apart, while other home-garden guidance gives vigorous vining plants 2–3 feet in all directions.[1][8]
A practical way to think about it:
- Tightly trained/staked plants: can use closer spacing when pruning/support and airflow are actively managed.
- Large cages / vigorous indeterminate plants: give more room.
- Humid or disease-prone gardens: extra airflow can be worth more than squeezing in one extra plant.
Support tomatoes at planting time
Do not wait until an indeterminate tomato is lying on the ground to decide how to support it.
Install cages, stakes, or trellis infrastructure at planting time whenever possible.[1]
Cages
Good for gardeners who want less pruning and plenty of branching. Cheap undersized cages often become inadequate for vigorous indeterminate varieties.
Stakes
Save space and make harvest accessible, but require regular tying and usually more training/pruning.
Trellises/string systems
Excellent when you want a deliberate vertical system. They require ongoing management but can keep rows organized and improve access.
Choose the support system before deciding how much to prune. Compare cages, stakes, and string training for indeterminate tomatoes.
Mulch and early-season temperature management
Mulch can conserve soil moisture and reduce soil splash onto lower leaves. But timing matters in a cold spring: heavy organic mulch placed over cold soil can slow warming.
In cool regions, gardeners sometimes use dark plastic or other season-extension methods to warm soil earlier.[1]
Once summer heat arrives, organic mulch can help buffer moisture swings—a useful strategy for reducing stress and helping limit fruit cracking later in the season.[10][11]
Watering after transplanting
Water the transplant thoroughly after planting to settle soil around the roots.
After establishment, aim for consistent root-zone moisture rather than repeated shallow sprinkles. University of Minnesota notes that consistent moisture supports fruit quality and that light watering encourages shallow rooting.[1]
The exact frequency depends on:
- soil texture;
- rainfall;
- plant size;
- temperature;
- mulch;
- container vs. in-ground culture.
Do not turn “one inch per week” into an automatic timer setting without checking the soil. Sandy soil and a mature container tomato can behave very differently from a mulched in-ground plant in clay.
Feeding tomatoes after transplanting
The transplant does not need a constant stream of high-nitrogen fertilizer simply because it is growing fast. Too much nitrogen can produce a lush, impressive plant that flowers or fruits poorly. Maryland Extension lists unusually tall, lush growth with poor flowering/fruiting as a sign to consider excess nitrogen, and Missouri likewise warns against fertility that pushes vegetative growth at the expense of fruit production.[16][22]
Use your preplant soil test as the base plan. If additional nitrogen is needed, side-dress around the fruiting phase rather than reflexively feeding every week. MU Extension’s garden-fertilization table places tomato side-dressing around the approach of first ripening and later harvest, but the exact product and rate depend on the fertilizer source, soil test, and local recommendation.[18]
Flowering, pollination, and fruit set
Tomatoes have flowers that are generally capable of self-pollination, but successful fruit set still depends on viable pollen, flower development, movement/vibration, and a plant that is not under excessive environmental stress. A plant can look alive and green while temporarily dropping flowers because the weather is outside its reproductive comfort zone.
Temperature guidance varies a little among Extension references, which is exactly why Hollowstead does not treat one threshold as a hard switch. Missouri’s 2026 heat guidance notes that fruit set often falls when days exceed about 90°F and nights remain above about 70°F; its home-tomato guide also notes flower-drop problems with very cool nights and more severe heat.[17][16] Penn State likewise describes flowers and fruit as more heat-sensitive than leaves and stems.[21]
- Cool-night watch
- Below ~55°F can interfere with set
- Hot-day watch
- Sustained ~90°F+ raises heat stress risk
- Warm-night watch
- Nights above ~70°F can be especially stressful
- Best response
- Reduce plant stress; do not force flowers with excess feed
If flowers are dropping during a heat wave, keep the root zone reasonably moist, preserve healthy leaf cover, and wait for better fruit-setting weather. If the weather is moderate and flowering is still poor, then broaden the diagnosis to sunlight, nitrogen, water stress, pests, or other plant-health issues.[22]
Blossom-end rot: what it is and what actually helps
Blossom-end rot (BER) is the dark, sunken, leathery damage that develops at the blossom end of enlarging fruit. The damaged tissue is short of calcium—but the useful diagnosis is not automatically “my soil needs more calcium.” Extension sources emphasize that inconsistent water supply, droughty or shallow root conditions, rapid growth, and excessive nitrogen can interrupt calcium delivery to developing fruit even when calcium exists in the soil.[17][20][23]
The first response is therefore to stabilize the system: water deeply enough to wet the active root zone, avoid repeated severe drying, mulch where appropriate, avoid excessive nitrogen, and use a soil test if you genuinely suspect pH or mineral problems. Remove badly affected fruit so the plant can direct resources elsewhere. When soil calcium is adequate, random calcium products do not substitute for reliable water movement through the plant.
Preventing common tomato diseases before they start
You cannot make an outdoor tomato disease-proof, but you can make the planting less hospitable to several common problems. Penn State’s tomato disease guidance emphasizes sanitation, rotation, airflow, mulching, proper irrigation, and removal of infected material; many foliar pathogens benefit when leaves stay wet and splash moves inoculum upward from plant debris or soil.[23]
- Start clean. Use healthy transplants and do not knowingly plant spotted or collapsing seedlings.
- Give the canopy room. Space and support plants so you can see into them, harvest them, and get air through them.
- Mulch after the soil has warmed. A mulch layer helps moderate moisture and reduces soil splash onto lower foliage.
- Water the root zone when practical. Avoid turning ordinary irrigation into repeated leaf-wetting events.
- Remove clearly diseased lower foliage with clean tools. Do not strip a healthy plant bare in the name of “airflow.”
- Rotate where your garden allows it. Penn State recommends not planting tomatoes and related nightshades in the same area more than once in three years when possible.[23]
- Know what you are seeing before spraying. Heat curl, herbicide injury, nutrient stress, mites, viruses, and fungal leaf spots can all create very different management decisions.[22]
In-season tomato troubleshooting
Start with the pattern: which plant part changed first, when did it happen, and what changed in the weather or root zone? The chart below is a triage tool, not a substitute for identifying a disease from good photos and local Extension guidance.
Growing tomatoes in containers
Tomatoes can grow very well in containers, but container culture removes much of the garden’s buffer against missed watering and nutrient fluctuations.
University of Maryland lists 5 gallons as a practical reference for a standard tomato, and Minnesota Extension likewise uses at least about five gallons as a baseline.[12][13]
For vigorous indeterminate cultivars, larger is usually easier. More root volume means:
- a larger water reservoir;
- less extreme root-zone temperature fluctuation;
- more nutrient-holding capacity;
- a heavier base for tall support.
Container rules that matter more than the exact gallon number
- Use drainage holes.
- Use potting mix, not compacted garden soil.
- Install sturdy support early.
- Expect more frequent watering than in-ground plants.
- Expect nutrients to leach with repeated watering.
- Check moisture during hot windy weather more than once if necessary.
A five-gallon pot can grow a tomato. That does not mean five gallons is the easiest possible environment for a six-foot indeterminate heirloom.
Tomato timing across the United States
The same seed-starting method can work nationally if the transplant window changes with climate.
Cold / short-season regions
The challenge is getting enough season after frost. Start indoors so a stocky transplant is ready when soil and nights become reliably warm. Season extension may be useful, but planting a warm-season tomato into cold soil simply because the calendar says “spring” can stall growth.
Temperate Midwest and Northeast
Last-frost timing is useful, but watch the weather trend. A nominal frost-free date followed by a week of cold rain and 40s at night is not the same environment as warm, settled weather.
Hot-summer South
The challenge can be the opposite: getting tomatoes established early enough to flower and set fruit before extreme summer heat. Gardeners may use earlier spring windows, fall crops, shade strategies, or heat-adapted cultivars depending on region.
Mild-winter / long-season regions
Some climates allow much longer tomato seasons or multiple planting windows. Work from local heat/frost patterns rather than copying a northern indoor-starting calendar.
The Hollowstead rule is simple: count backward from favorable transplant conditions.
Can tomatoes be direct-sown outdoors?
Yes—under the right conditions.
Tomatoes are naturally capable of growing from seed outdoors once the soil is warm. The reason most U.S. gardeners start them indoors is not because direct sowing is impossible. It is because tomatoes need a relatively long warm season, and indoor starting buys several weeks of growth before outdoor conditions are ready.
Direct sowing can make more sense when:
- the frost-free season is long;
- soil warms early;
- you are willing to harvest later;
- you are planting a fast-maturing variety;
- you have protection from pests/weather during emergence.
In a short northern season, direct sowing may waste too much of the available summer.
End-of-season cleanup and rotation
The growing guide does not end when the last tomato comes inside. What remains in the bed can influence next year’s starting pressure from disease and volunteer plants.
- Remove tomato vines and fruit that are clearly diseased or rotting rather than leaving them in place through winter.
- Pull volunteer tomatoes and nightshade weeds that can carry problems between seasons.
- Clean reusable stakes, cages, clips, and tools before they move into next year’s planting.
- Where space allows, rotate tomatoes, peppers, eggplant, and potatoes away from the same bed for roughly three years; small gardens may need to combine rotation with sanitation, resistant varieties, containers, or fresh growing media.[23]
- Write down which problems appeared, when they appeared, and which varieties were affected. That record is more useful next spring than trying to remember a leaf spot from ten months earlier.
Common tomato seed-starting mistakes
Starting too early
The seed packet says “start indoors,” so it is tempting to begin months ahead. That can produce huge transplants that require repeated potting and powerful light.
Better: count backward from a realistic transplant window.
Keeping emerged seedlings on the heat mat in weak light
Warmth accelerates growth. Weak light cannot support compact growth.
Better: give strong light immediately and stop treating an emerged tray like a germination tray.
Watering because it is “watering day”
Roots do not care what day it is.
Better: water based on root-zone moisture, pot size, plant size, and environment.
Fertilizing every problem
Yellowing can come from nutrient deficiency—but also saturated roots, low light, temperature stress, or disease.
Better: diagnose before feeding.
Skipping hardening off because the day looks warm
Warm air does not make indoor leaves instantly resistant to full sun and wind.
Better: acclimate gradually.
Planting outside because the frost date passed
A frost date is a probability marker, not a guarantee of warm soil and good transplant weather.
Better: look at frost risk, nights, soil warmth, forecast, and plant readiness together.
Advanced grower notes
Temperature and light are a coupled system
A seedling’s shape is not controlled by one dial. Temperature affects how quickly tissue develops; light controls the energy available to support that growth. A warm seedling under excellent light can be compact and vigorous. The same warmth under marginal light can produce excessive elongation.
This is why “lower the temperature” can help with legginess without being the real cure for a dark growing area. The primary cure is adequate light.
Root-zone conditions matter more than room comfort
Gardeners often describe a seed room by air temperature while the roots experience something else entirely. A tray beside a cold window can have a root zone far below room temperature. A black nursery pot sitting in strong sun can become much hotter than the air.
Measuring the medium is useful when seedlings behave unexpectedly.
Bigger transplants are not automatically better transplants
Judge transplant quality by stockiness, root condition, healthy foliage, and readiness to establish after planting.
Keep records
If you start tomatoes every year, record:
- sowing date;
- cultivar;
- germination temperature;
- first emergence;
- pot-up date;
- hardening start;
- transplant date;
- first flower;
- first ripe fruit.
After two or three seasons, your own records become more useful than a national calendar.
GROW FROM SEED
Five Hollowstead tomato varieties
The same seed-starting method works for all five Hollowstead tomato varieties. Choose among them by mature plant habit, the fruit you want, and how you plan to use the harvest.
| Variety | Main use | Plant habit |
|---|---|---|
| Black Krim | Large fresh slices | Indeterminate |
| Black Cherry | Dusky cherry fruit and frequent fresh harvests | Indeterminate |
| Principe Borghese | Drying, roasting and cooking | Compact determinate in the current listing |
| Yellow Pear | Yellow pear-shaped fruit for salads and snacking | Indeterminate |
| Pineapple | Large golden-and-red fresh slices | Indeterminate |
Black Krim Tomato Seeds
A dark, full-size indeterminate slicer with the classic large-heirloom tradeoffs: substantial support, a long harvest season, and greater attention to fruit cracking and ripeness cues.
Shop the seedsRead the variety guide
Black Cherry Tomato Seeds
An indeterminate cherry tomato for repeated picking. The fruit is small; the vine is not. Give it real support and enough room to keep harvesting through the season.
Shop the seedsRead the variety guide
Principe Borghese Tomato Seeds
A small-fruited Italian heirloom for drying and cooking. The current Hollowstead listing describes compact determinate plants: support the fruit load, retain healthy side shoots, and plan for a more concentrated harvest. See the Principe Borghese guide for planting and controlled drying.
Shop the seedsRead the variety guide
Yellow Pear Tomato Seeds
An indeterminate tomato with small yellow, pear-shaped fruit for fresh salads and repeated picking. Plan a sturdy support and room for the vine. Hollowstead’s packet uses about 78 days from transplanting; Cornell records a main-season, open-pollinated Yellow Pear with roughly 1½-inch fruit.[24]
Shop the seedsRead the variety guide
Pineapple Tomato Seeds
A large bicolor slicer for golden-yellow and red tomato plates. Its indeterminate vine needs strong support for heavy fruit. Use 85–90 days from transplanting as the first-ripe planning estimate and leave room in the season for weather delays.
GROW THESE TOMATOES
Put the guide to work.
Choose a variety that fits the way you want to grow and harvest, then use the guide above as your reference through the season.
HOLLOWSTEAD SEED
Black Cherry Tomato Seeds
$4.49
HOLLOWSTEAD SEED
Principe Borghese Tomato Seeds
$4.49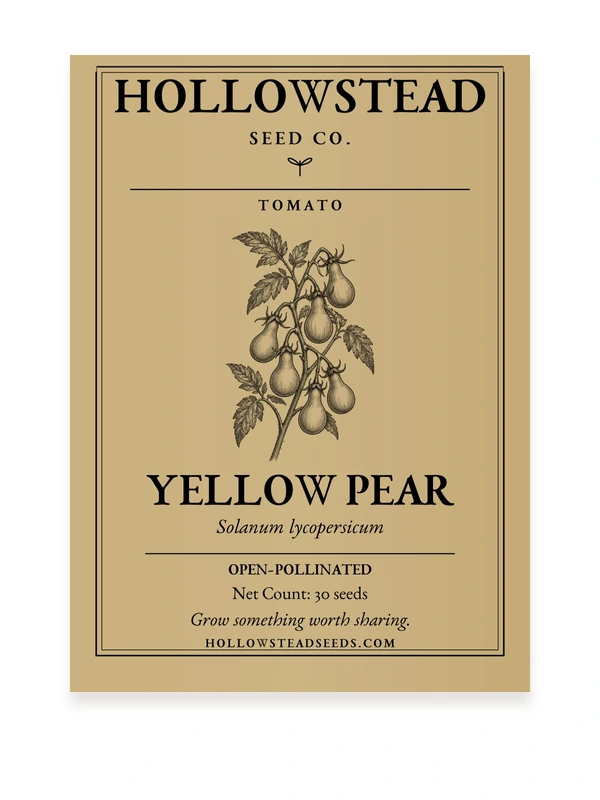
HOLLOWSTEAD SEED
Yellow Pear Tomato Seeds
$4.49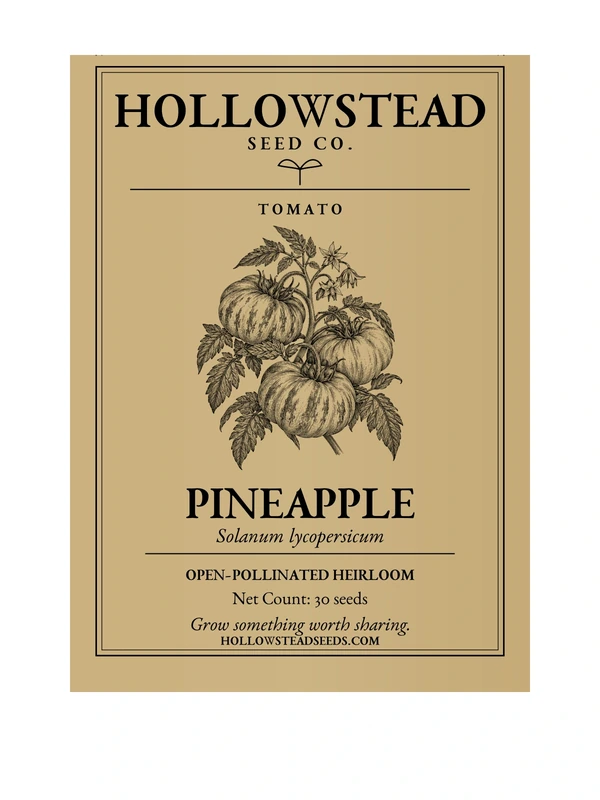
HOLLOWSTEAD SEED
Pineapple Tomato Seeds
$4.49KEEP LEARNING
Related Hollowstead guides
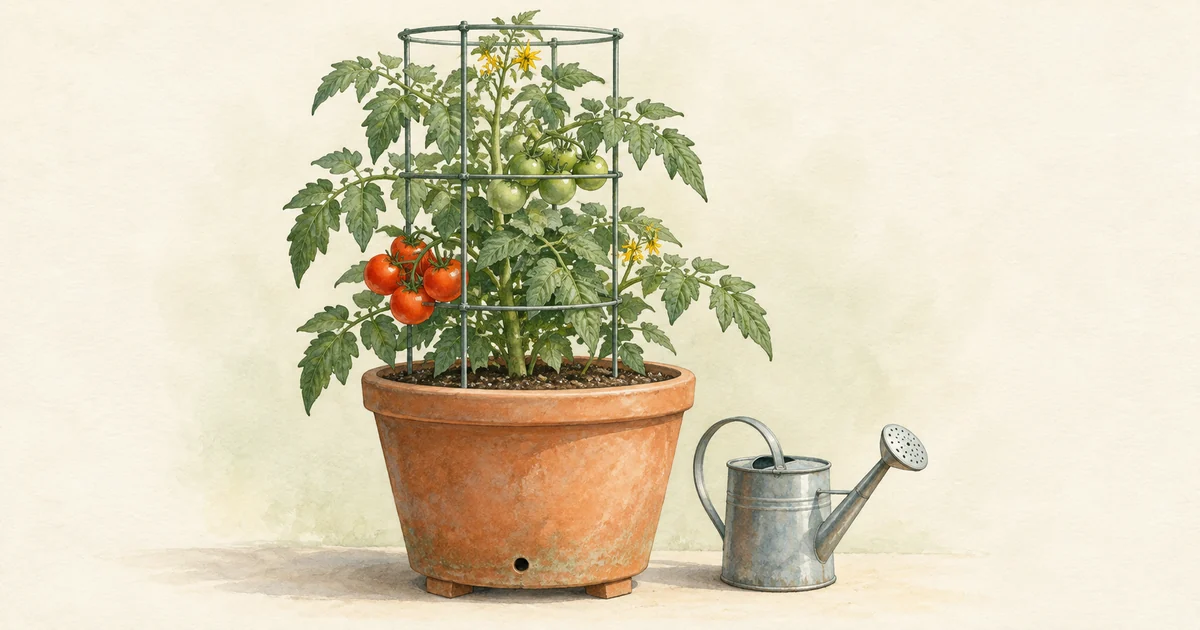
CONTAINER TOMATOES
Growing Tomatoes in Containers: Pots, Support, and Watering
Plan pots, support, and watering for all five Hollowstead tomatoes, including Yellow Pear and Pineapple. Compare growth habits, choose a generous root volume, and check moisture daily.
Read the guide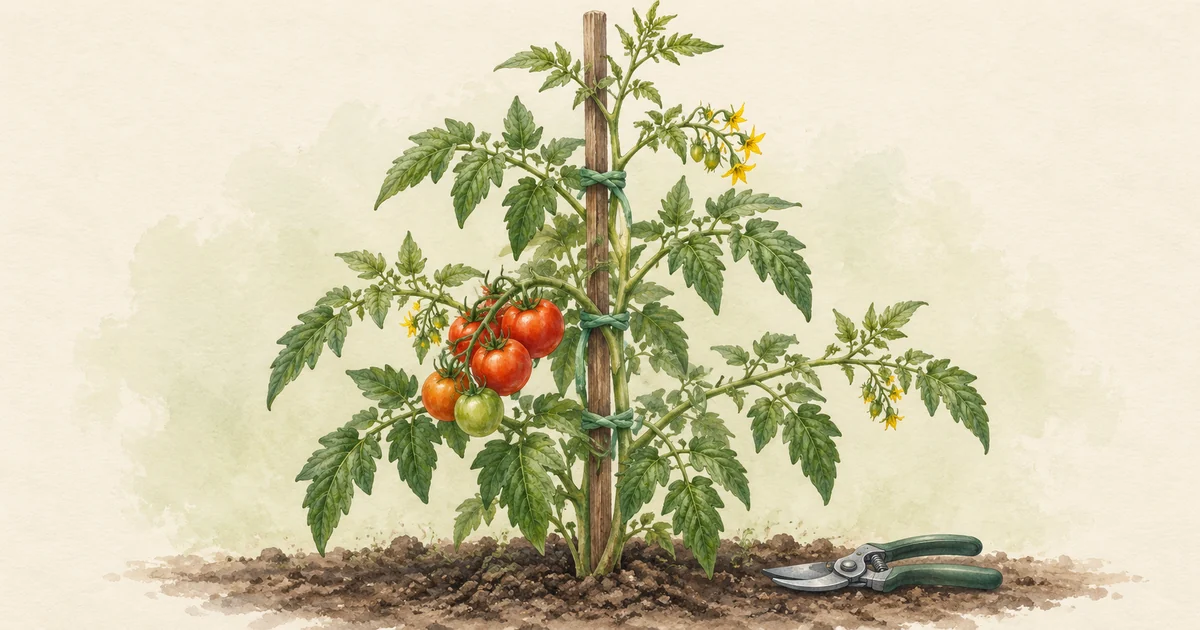
TOMATO SUPPORT & PRUNING
How to Support and Prune Indeterminate Tomatoes
Choose a cage, stake, or string system for Black Krim, Black Cherry, Yellow Pear, or Pineapple. Identify suckers, keep useful foliage, and distinguish indeterminate training from determinate care.
Read the guide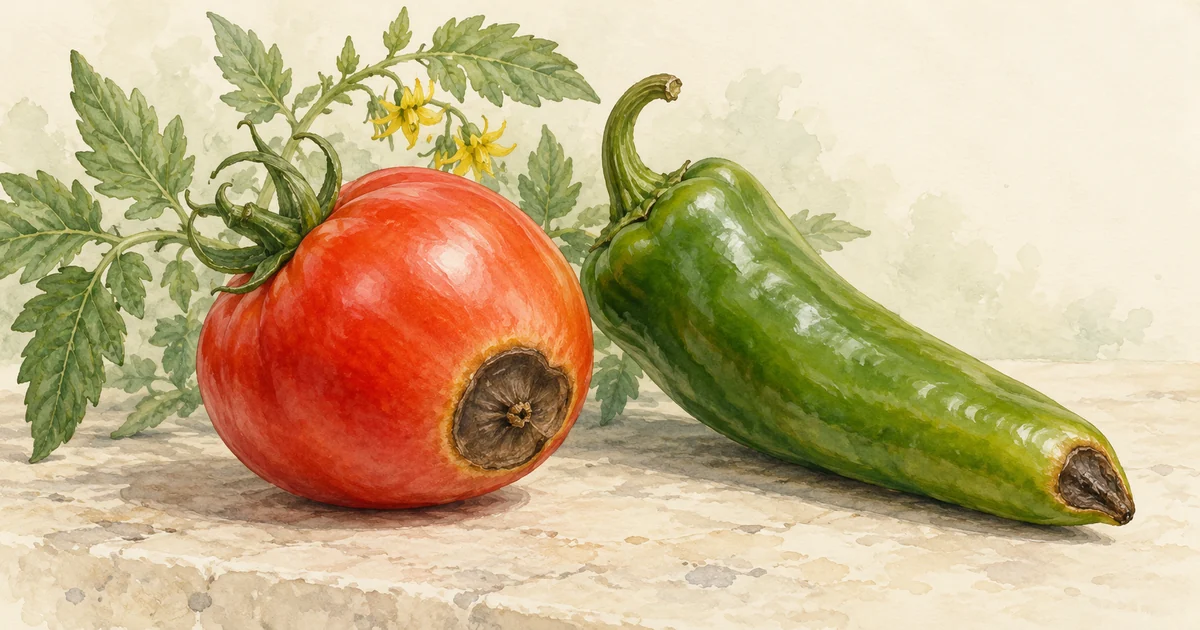
TOMATO & PEPPER PROBLEMS
Blossom-End Rot in Tomatoes and Peppers: What to Check
A dark fruit tip calls for a diagnosis, not an automatic dose of calcium. Check symptom location, root-zone moisture, and feeding history, then protect the next developing fruit.
Read the guideFrequently asked questions
Should tomato seeds be soaked before planting?
Usually no. Tomato seeds generally germinate reliably when sown directly into moist seed-starting mix at an appropriate temperature. Soaking adds another step without being necessary for ordinary fresh seed.
Do tomato seeds need light to germinate?
They do not need grow-light exposure to trigger germination the way some light-requiring seeds do. But the seedling needs strong light immediately after emergence.[2]
Do you need a heat mat for tomato seeds?
No. You need a warm enough root zone. A heat mat is simply a convenient tool when the room or tray is too cool.
How many tomato seeds should I sow per cell?
If germination is expected to be good, one seed per cell wastes fewer seeds. Sowing two gives insurance, but you may need to thin or separate seedlings later.
Can I start tomatoes in regular potting soil?
You can, but fine-textured seed-starting mix is easier to manage in small cells and is designed for germination. Heavy mixes may stay too wet or contain coarse material that makes shallow sowing uneven.
When should I remove a humidity dome?
Once seedlings begin emerging. A dome is useful for slowing moisture loss during germination; keeping it on after emergence can create unnecessarily humid, stagnant conditions.
Why are my tomato seedlings tall and skinny?
Usually because they are receiving too little usable light for the rate at which they are growing. Improve light first, then review warmth, crowding, and potting space.
Can leggy tomato seedlings be saved?
Often, yes. Tomatoes tolerate deeper potting because buried stem tissue can root. But severely weak, diseased, or repeatedly stressed seedlings may be less trouble to restart if there is still time.
When should I fertilize tomato seedlings?
How cold is too cold for tomato seedlings outside?
Tomatoes are warm-season plants. During hardening, University of Maryland advises bringing tomato/pepper transplants in when nights are expected below about 50°F and avoiding outdoor exposure for tender seedlings in particularly cold/windy conditions.[6]
Does planting tomatoes deeper really create more roots?
Is five gallons big enough for a tomato plant?
Sources & further reading
- University of Minnesota Extension. Growing tomatoes in home gardens. https://extension.umn.edu/vegetables/growing-tomatoes
- Penn State Extension. Seed and Seedling Biology. https://extension.psu.edu/seed-and-seedling-biology
- University of Maryland Extension. Starting Vegetable Seeds Indoors. Starting Vegetable Seeds Indoors
- Illinois Extension. Starting Seeds / Seed Starting. https://extension.illinois.edu/blogs/good-growing/2019-03-05-seed-starting
- University of Minnesota Extension. How to prevent seedling damping off. https://extension.umn.edu/solve-problem/how-prevent-seedling-damping
- University of Maryland Extension. Planting Vegetable Transplants. https://extension.umd.edu/resource/planting-vegetable-transplants
- University of Missouri Extension. Starting Plants Indoors From Seeds. https://extension.missouri.edu/publications/g6570
- Utah State University Extension. Planting and Spacing: Tomato, Pepper, Eggplant. https://extension.usu.edu/vegetableguide/tomato-pepper-eggplant/planting-spacing
- Penn State Extension. Tomatoes: From Seedlings to Fruit. https://extension.psu.edu/tomatoes-from-seedlings-to-fruit
- University of Minnesota Extension. Tomato fruit cracks diagnostic. https://apps.extension.umn.edu/garden/diagnose/plant/vegetable/tomato/fruitcracks.html
- Penn State Extension. Why Are My Tomatoes Cracking and What Can I Do About It? https://extension.psu.edu/why-are-my-tomatoes-cracking-and-what-can-i-do-about-it
- University of Maryland Extension. Growing Vegetables in Containers and Salad Tables. https://extension.umd.edu/resource/growing-vegetables-containers-and-salad-tables
- University of Minnesota Extension. Early season tomato sleuthing. https://extension.umn.edu/about/our-stories/news/yard-and-garden-news/early-season-tomato-sleuthing
- Penn State Extension. Season Extenders and Growing Fall Vegetables. https://extension.psu.edu/season-extenders-and-growing-fall-vegetables
- University of Maryland Extension. Fall Vegetable Gardening. https://extension.umd.edu/resource/fall-vegetable-gardening
- University of Missouri Extension. Growing Home Garden Tomatoes. https://extension.missouri.edu/publications/g6461
- University of Missouri Extension. Tomatoes struggle in summer heat. https://extension.missouri.edu/news/tomatoes-struggle-in-summer-heat
- University of Missouri Extension. Steps in Fertilizing Garden Soil: Vegetables and Annual Flowers. https://extension.missouri.edu/publications/g6950
- University of Maryland Extension. Growing Tomatoes in a Home Garden. https://extension.umd.edu/resource/growing-tomatoes-home-garden
- University of Maryland Extension. Blossom End Rot on Vegetables. https://www.extension.umd.edu/resource/blossom-end-rot-vegetables
- Penn State Extension. Heat Stress and Tomatoes. https://extension.psu.edu/heat-stress-and-tomatoes
- University of Maryland Extension. Key to Common Problems of Tomatoes. https://extension.umd.edu/resource/key-common-problems-tomatoes
- Penn State Extension. Tomato Diseases and Disorders in the Home Garden. https://extension.psu.edu/tomato-diseases-and-disorders-in-the-home-garden
- Cornell Cooperative Extension. Vegetable Varieties for Gardeners: Yellow Pear tomato. https://vegvariety.cce.cornell.edu/main/detail.php?filterBy=0&variety_id=1596
Hollowstead Growing Notes
A little help for your next growing season
Practical sowing advice, help choosing seeds, and occasional Hollowstead shop news. Usually one or two emails a month, plus a short welcome note.
Choose your topics and frequency after you confirm. Our guides and planting calendar are always free.